Category Archives: Various Cards

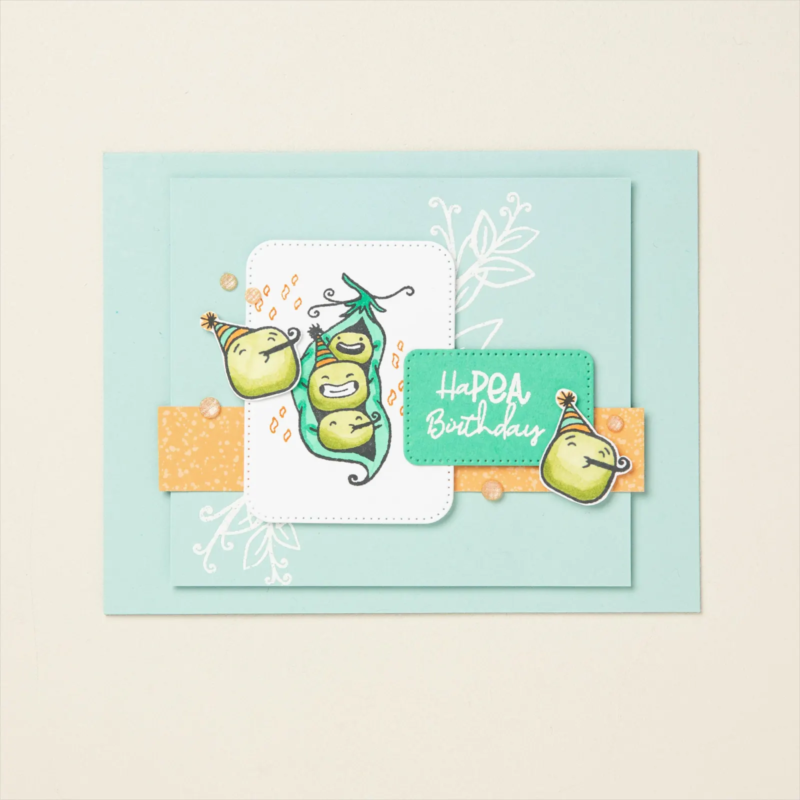
Be HaPEA

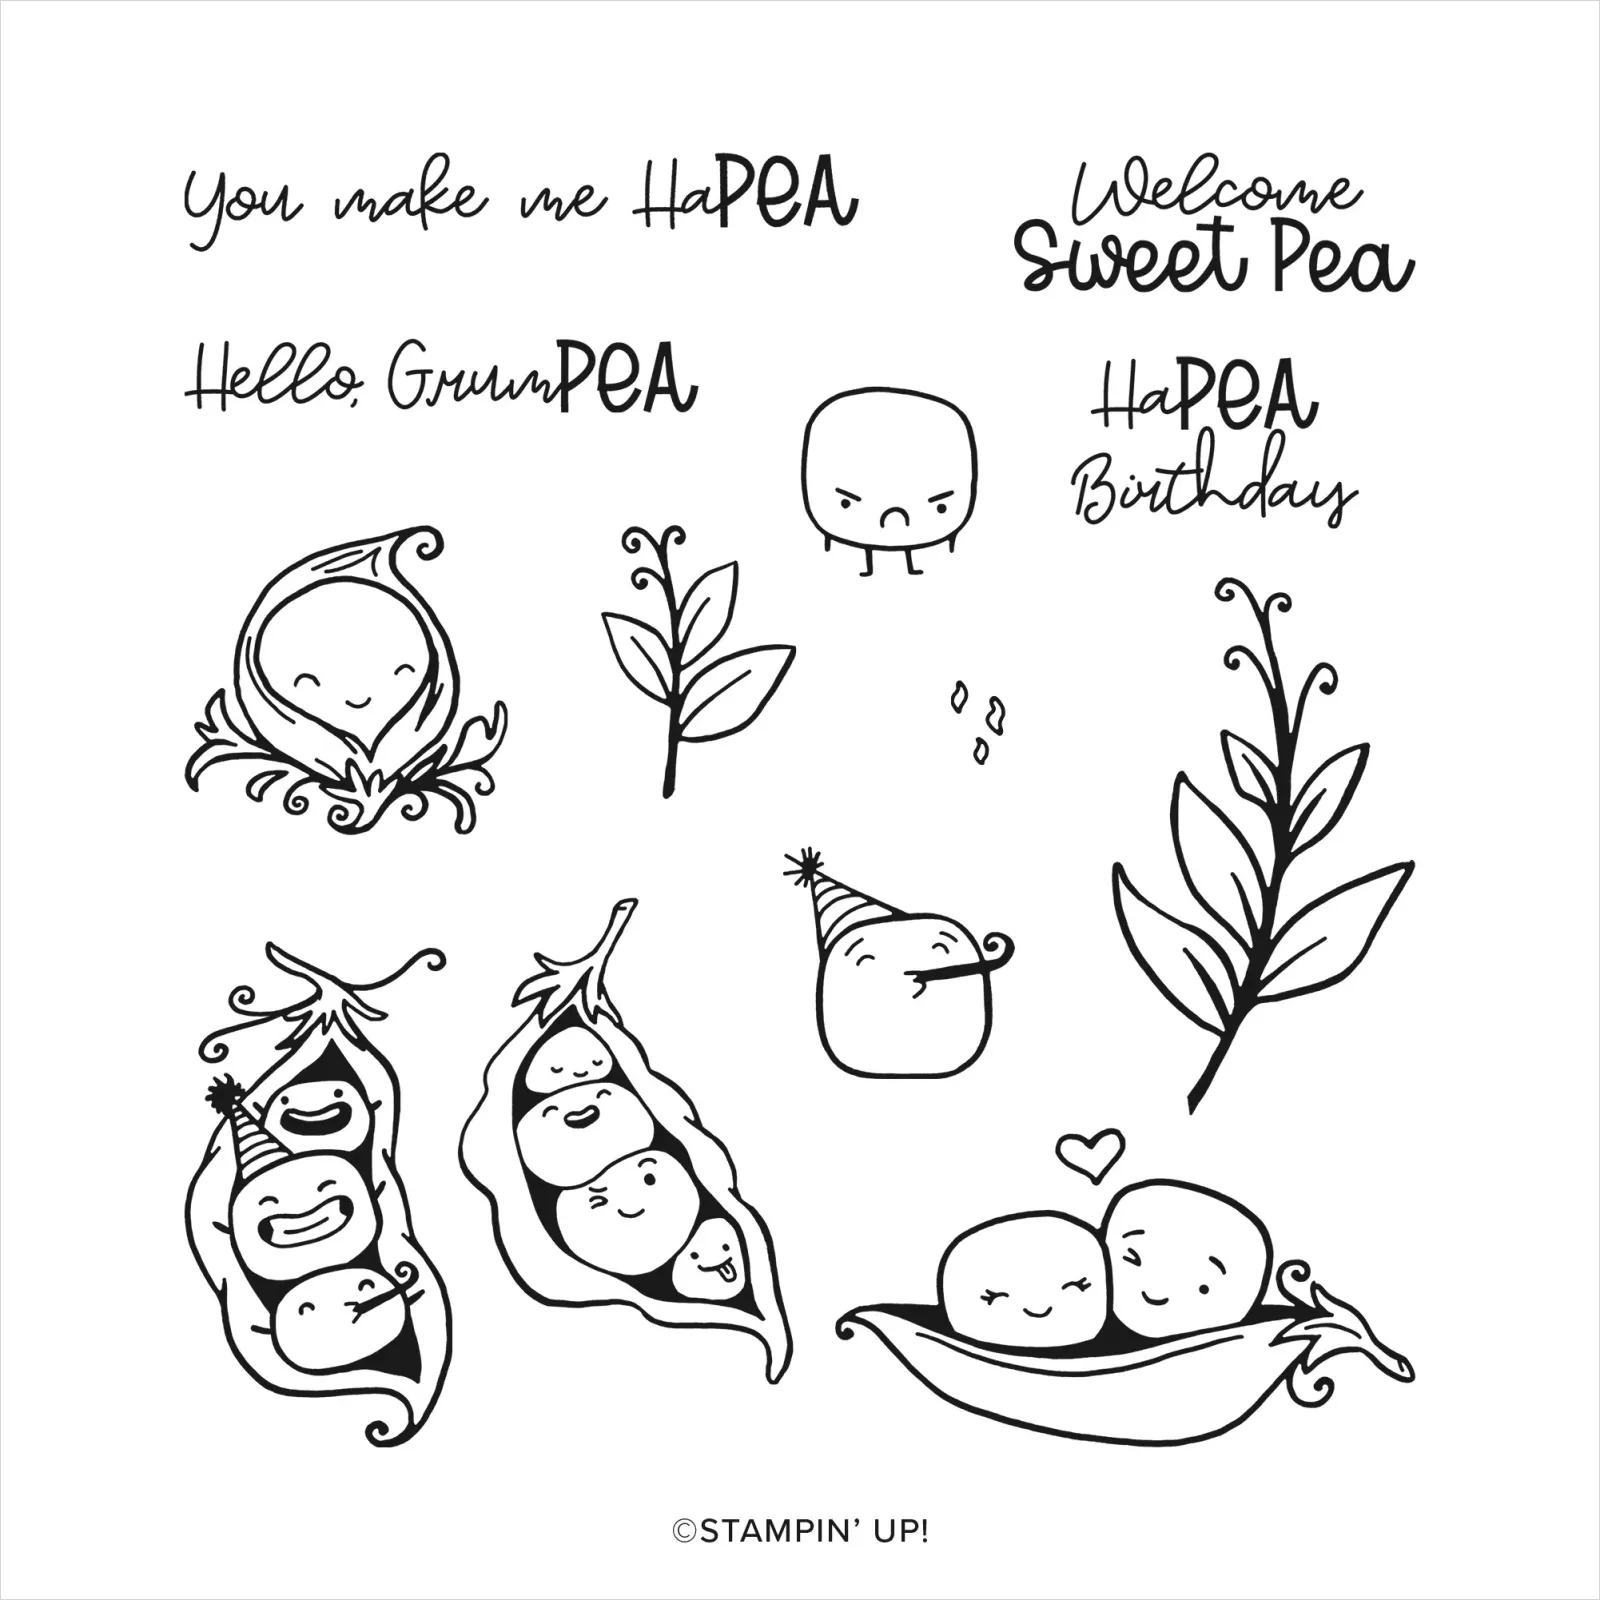
The sweet peas stamp set is one you can use for all occasions, from birthday to a new baby.  Have some fun with it. 

For this card, grab your colouring pens, embossing powder and heat tool.

Stamp some peas onto some cardstock to cut out and stamp the peas in a pod onto a piece that you can die cut or punch out.  Use your memento black or another ink colour. Have some fun colouring them in.  Cut out the small peas – a little therapeutic fussy cutting.

On the smaller piece of cardstock, decide on your placement and then stamp a couple of the flowery stamps using versamark and then heat emboss.

Stamp your sentiment with versamark and heat emboss that then punch or die cut.

For the strip, use a piece of patterned paper and trim to your desired width – the piece on this card is slightly longer than the layer.

Layer up your pieces, glue down and add some sparkly gems.  Voila!

SWEET PEAS PHOTOPOLYMER STAMP SET Item #163621

Enjoy Creativity | Step it Up

Let’s step it up using the Above It All Bundle. Keep your card simple with the Avid design or “step it up” by making the Artfully Avid card!

AVID
To make this card, stamp the gondola image in Pecan Pie ink on Basic White Cardstock. Die cut the image, then then die cut the mountain range pieces from Fresh Freesia and Blackberry Bliss Cardstock.

Adhere all the pieces to some Petal Pink card base and add some Iridescent Rhinestone Basic Jewels. These rhinestones are perfect for any project because they pick up the colour of the cardstock they’re placed on.

ARTFULLY AVID

To make this card, use the dies instead of stamps to create the gondola image. Emboss the stars on your card base and use Blending Brushes and Petal Pink ink to add more colour to the card base.

Add some trees and an additional mountain range piece using Fresh Freesia Cardstock coloured with a Blending Brush and Blackberry Bliss ink.

Ta dah!


Thanks so much for taking the time to stop by – I hope you have a wonderful day.

Enjoy Creativity | CASEing Colour

The birthday card using the waves dies has such a great colour scheme, why not CASE it to create another!

Using the Timeless Arrangements Dies, die cut flower and leaf images in Basic White, Boho Blue, Misty Moonlight, Pool Party, Wild Wheat, and Very Vanilla.

Layer the die-cut pieces and adhere them to a circle of Very Vanilla Cardstock that is cut using the 2-3/8″ (6 cm) Circle Punch.

Next adhere the cardstock to a panel of Countryside Inn Designer Series Paper using Multipurpose Liquid Glue. Stamp out your sentiment and heat emboss it using gold Metallics Stampin’ Emboss Powder. Die cut the sentiment and adhere it to the card. To finish, use a few Festive Pearls to bring in more of the gold from the colour palette.

Take your inspiration from other products to create your own masterpiece.

Enjoy!

Enjoy Creativity | Thanks So Much

Try your hand at Copying And Sharing Everything!

When you see an idea in the catalogue that you like, CASE the layout. 

Turn the Thanks So Much into a new idea by using the Modern Garden Bundle to make a Zum Fest card (remember that some stamp sets are in a different language to English).

First, stamp the flowers and leaves using Calypso Coral, Flirty Flamingo, Fresh Freesia, and Garden Green ink as well as stamping off (ink the stamp and stamp off by stamping onto a scrap and then onto another piece of cardstock) a few flowers to make the colours a little less bright, and then fussy cut everything.

Next, stamp out the sentiment in VersaMark ink, punch it out with the Modern Oval Punch, and then heat emboss with copper Metallics Stampin’ Emboss™ Powder.

Assemble all the flowers and the sentiment on Vellum Cardstock, taking care to arrange everything so the card had a similar layout to the Thanks So Much card (or be adventurous and do your own thing). Adhered the Vellum to the card front, and then finish the card with some Adhesive-Backed Speckled Dots.

Don’t be afraid to CASE it! Copy the layout, or you can even mimic the colours or the techniques—the possibilities are endless!

Enjoy!

Enjoy Creativity | Autumn Leaves

Autumn leaves – step by step

Stille Anteilnahme card (4-1/3″ x 5-7/8″) (10.9 x 14.9 cm)

Depending on your location, autumn arrives at a different time of the year, here in the UK it has begun and the colour of the landscape is starting to change.  Here is some autumn inspiration, for wherever you are, and whatever level of crafting you are at.

CASUAL
For the easy-to-make Stille Anteilnahme card, branch out with a creative and beautiful colour combination—Copper Clay, Misty Moonlight, and Petal Pink. And while the colours make this card stand out, the leaf shapes with the two-step vein outlines give it fabulous depth. You can also bring in some extra dimension by placing a border underneath the sentiment. Lastly, the Linen Thread bow helps to “tie in” the Crumb Cardstock card base.

AVID
Step up the Avec toute ma gratitude card by stamping the sentiment on the label die cut using VersaMark ink; then, sprinkle with copper Stampin’ Emboss Powder and heat emboss. Once that’s done, apply an Adhesive Sheet to Copper Clay Cardstock and die cut the leaf veins, thus making it easy to adhere them to the stamped leaves. You’re almost done use the dotted lines texture die as a border accent on a Basic White Cardstock piece, and complete the look with a Linen Thread bow + sparkly sequins.

ARTFULLY AVID
For the most stepped-up card—the Altijd in onze gedachten card—paint the leaf veins with Copper Enamel Effects and adhere them to the leaves; then, add water to the Copper Enamel Effects and splatter the leaves and card front. And that beautiful sentiment tag? Use a Blending Brush to add Petal Pink ink to the Basic White Cardstock, then heat emboss the sentiment. To finish, add lovely texture to the top and bottom of the card using the dotted lines texture die. 

Enjoy!

Enjoy Creativity

Now that it’s a new year, hopefully we can all spend a little more time doing what we love: stamping! Whether you want to keep your projects simple or step them up, here are three cards created using the Sale-A-Bration Thanks a Bunch Stamp Set will help you get back into the stamping spirit.

CASUAL
Keep it casual by simply stamping some carrots and leaves on a piece of white cardstock.  Add a few polka dots and accent with a die cut sentiment.

AVID
Take the card up a level by stamping and cutting out some carrots and leaves.  Then stamp and heat boss some polka dots.  You can either do that with the carrots stuck down, or, why not stamp and emboss and then using some  Stampin’ Dimensionals pop up the carrots, being sure to line them up with the dots. For some added effect, add a few Classic Matte Dots as a simple embellishment.

ARTFULLY AVID
Step it up even more with the third card. First, blend the Dots & Spots panel with Calypso Coral ink and splattered that and the carrots with water to give them a watercolour look. Then instead of stamping out the accents on the carrots, heat embossed them with gold Stampin’ Emboss Powder for an extra shine. Next, stamp out the carrot leaves, stamping them off a few times to make a few leaves a bit lighter. Fussy cut the leaves and crumpled them a bit before attaching them to the carrots. To finish off, untwist some gold Simply Elegant Trim, and using the frayed pieces tie a few bows before adhering them to the tops of the carrots.


Now, do you see what I see?

Enjoy Creativity

Anytime is the perfect time to send love to people you care about, and what better way than with a handmade card? Spread the love —you never know who may need it!

Step up your cardmaking, or just keep it simple.  Here are three cards taking you from casual to artfully avid.

CASUAL
This card super simple by adhering a 4-1/2″ x 4-1/4″ (11.4 x 10.8 cm) card front to the card base with Stampin’ Dimensionals— the same colour is used for the card front and base. Add a narrow 2-1/2″ x 4-1/4″ (6.4 x 10.8 cm) piece of Basic White Cardstock as the focal point. Stamp the lighthouse image using the Lighthouse Point Stamp Set, add a sentiment, and finish it off with a Linen Thread for a nautical rope feel.

AVID
Step up the second card by stamping with VersaMark ink on the card base to give the illusion of clouds. Then tear some Bermuda Bay and Soft Suede Cardstock to represent water and land. To add a bit more texture to the cardstock, use the Painted Texture 3D Embossing Folder.

ARTFULLY AVID
For the final card, die cut a few pieces to assemble the lighthouse and add some rocks to the landscape. Then finish up the card with some Faux Sea Glass Shapes—aren’t they fabulous with the way they match the water theme.

Sale-A-Brate Christmas CASEing

When your mojo is under the weather, why not CASE (Copy and Share Everything) a project! 

For this stunning Christmas card, cut background trees from one of the bokeh sheets in the Lights Aglow 6″ x 6″ (15.2 x 15.2 cm) Specialty Designer Series Paper (instead of using the original card’s cardstock). The bokeh Designer Series Paper softens the colour gives a stepped-up look, yet it’s so easy to achieve.

Next, using heat embossing brings the card to the next level. Simply stamp off the tree silhouette images from the Trees for Sale Stamp Set in Evening Evergreen and Sahara Sand ink. Stamp the branches with VersaMark ink, sprinkle with gold Stampin’ Emboss Powder, and heat set; then, die cut the trees using the Tree Lot Dies.

Isn’t this a fun card? Use the ideas you see here—or CASE them to create your own lovely composition. Either way, with these ideas in your creative tool belt, you’re well on your way towards crafting a stack of Christmas cards in plenty of time for the happiest season of all!

Note: The Tree Lot Dies used for this card are an exclusive Sale-A-Bration item and coordinate with the Trees for Sale Stamp Set in the July–December 2022 Mini Catalogue.

Simple Stamping with Happy Hedgehogs

As the saying goes, “Beauty lies in simplicity.” It’s a good rule for life and it holds true for cards, too! And remember, the simpler the card, the faster you’ll be done and able to give it to someone who could use a little pick-me-up or word of cheer!

Our simply stamped cards with the Happy Hedgehogs Stamp Set took just minutes to make. For two of the cards, we stamped the same image in different yet complementary colours, allowing you to create a visually complex look with minimal fuss. Also, notice how easy it was to add a little pop using a few well-placed embellishments (in this case, Pastel Pearls)! We kept the cute mushroom card easy by using just one of the blends in each combo (Crumb Cake, Granny Apple Green, and Real Red).

Why not try your hand at making these cards! Shop for your supplies by clicking here.


Waves of the Ocean

Hi, I hope you are well.

Each of the world’s wide and open oceans is brimming with beauty and wonder. Marvellous marine animals, miles of submerged mountain ranges, and unique underwater plants lie thousands of feet below Earth’s dry surface, encouraging exploration and awaiting discovery.

Discover the depths of the ocean—and your artistic abilities—with the Waves of the Ocean Collection! This coastal collection includes an inspiring set of stamps and detailed dies, both early-release products from the upcoming 2022–2023 Annual Catalogue. Plus, a pack of paper made from images of hand-poured paint, blue-hued foil sheets for a sea of shine, and radiant rhinestones for a splash of sparkle—each an exclusive product you can only purchase during the promotion period!

Explore artistic expression with the Waves of the Ocean Collection. With these seaside supplies, you’ll dive into inspiration and swim in a sea of creativity! 

STAMPIN UP WAVES OF THE OCEAN FLYER

SALES PERIOD – 1 MARCH–2 MAY 2022
  • The Waves of Inspiration Stamp Set and Waves Dies can be ordered separately, if desired.
  • The Waves of Inspiration Stamp Set and Waves of the Ocean Collection are available in English, French, and German.
  • The following exclusive products are only available while supplies last:
    • Waves of the Ocean 12″ x 12″ (30.5 x 30.5 cm) Designer Series Paper
    • Blue Foils 12″ x 12″ (30.5 x 30.5 cm) Specialty Paper
    • Rhinestone Waves Basic Jewels
  • Qualifying orders are eligible for Stampin’ Rewards. (Except for the Waves of the Ocean Collection)