Category Archives: Birthday

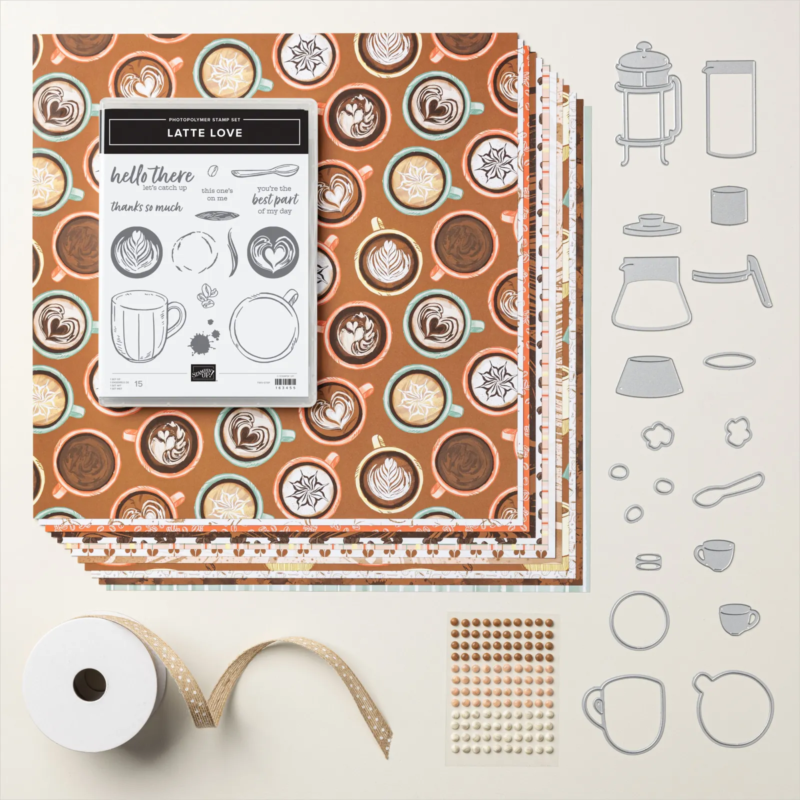
A whole Latte Love

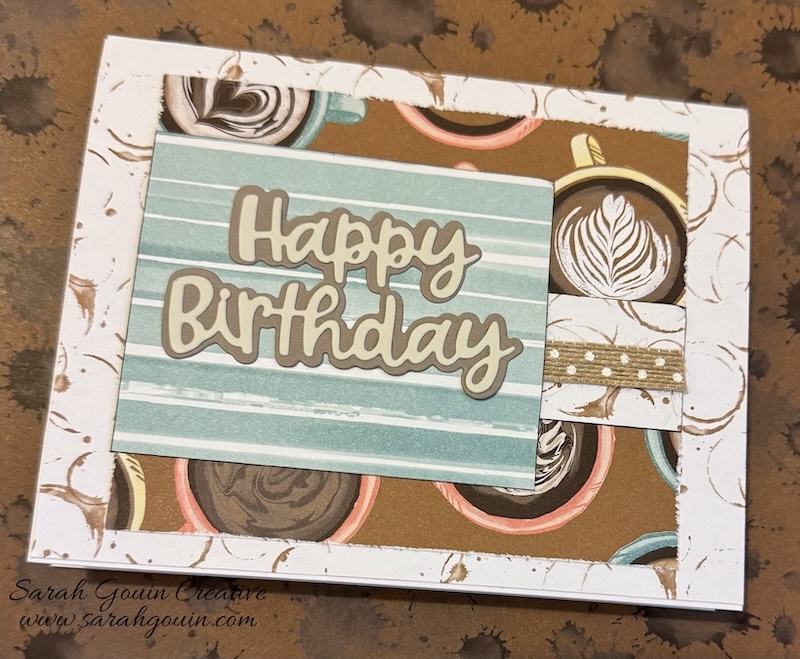
So this took me a while, I did get the stamps out and stamped a few images and then went rogue and just used the papers, and some other things too!

The papers from the online exclusive so are not in any catalogue.  The papers are double sided and I used two sheets out of the pack. 

I have used the happy birthday from the wanted to say dies, which are carried over into the next catalogue with the happy birthday die cut from the new basic beige.  I roughed up the edge of the coffee cups, and for the strip and ‘blue’ piece went around the edge with a marker to give it a bit of a pop. I took the photo on a piece of paper that is also included in the papers!

And just a little reminder, the items retiring in the mini catalogue and 2023-2024 catalogue last chance ends tomorrow (29 April) in case there is still something you fancy to add to your crafting needs.
 

Stampin up latte love

Kit number 2 – Birthday Sparkle

Create glittering birthday cards and gift tags with the Birthday Sparkle Kit! This kit includes six cards and six gift tags. Create each project with the included stamp set, die-cut paper pieces, and twine. It also includes other elements such as glitter stickers, pressed wood picks, coordinating envelopes, and gold foil paper pieces! It’s easy to create each project for your recipient or get ahead on your crafting for the year by making quick multiples. Either way, you’ve got a special paper craft that your recipients will love! Also available in French and German.

Kit includes:
*Birthday Sparkle Photopolymer Stamp Set
*Clear Stamp Block
*Early Espresso Stampin’ Spot
*Pre-designed projects
*Step-by-step instructions
*Pre-cut pieces (No prep work! Get right to crafting)
*Makes 6 cards and 6 gift tags
*Cards: 3 each of 2 designs; folded card 5-1/2″ x 4-1/4″ (14 x 10.8 cm)
*Gift tags: 3 each of 2 designs; largest tag 2-1/4″ x 3-1/2″ (5.7 x 8.9 cm)
*6 pre-printed envelopes
*Enough adhesive to complete projects
*Gold glitter stickers and pressed wood picks
*Baker’s Twine in Early Espresso and White
*A 9-7/8″ x 6-1/2″ x 2-3/4″ (25.1 x 16.5 x 7 cm) printed designer box for storage or crafting on the go

Product colours: Basic White, Crumb Cake, Early Espresso, gold glitter
 
See more in the unboxing video!

Enjoy Creativity

Anytime is the perfect time to send love to people you care about, and what better way than with a handmade card? Spread the love —you never know who may need it!

Step up your cardmaking, or just keep it simple.  Here are three cards taking you from casual to artfully avid.

CASUAL
This card super simple by adhering a 4-1/2″ x 4-1/4″ (11.4 x 10.8 cm) card front to the card base with Stampin’ Dimensionals— the same colour is used for the card front and base. Add a narrow 2-1/2″ x 4-1/4″ (6.4 x 10.8 cm) piece of Basic White Cardstock as the focal point. Stamp the lighthouse image using the Lighthouse Point Stamp Set, add a sentiment, and finish it off with a Linen Thread for a nautical rope feel.

AVID
Step up the second card by stamping with VersaMark ink on the card base to give the illusion of clouds. Then tear some Bermuda Bay and Soft Suede Cardstock to represent water and land. To add a bit more texture to the cardstock, use the Painted Texture 3D Embossing Folder.

ARTFULLY AVID
For the final card, die cut a few pieces to assemble the lighthouse and add some rocks to the landscape. Then finish up the card with some Faux Sea Glass Shapes—aren’t they fabulous with the way they match the water theme.

Technique Focus—Stamping on Designer Series Paper

Designer Series Paper isn’t like regular cardstock—it has unique designs and textures. Because of these features, sometimes we forget that we can stamp on it just like cardstock! 

The stamped flower images don’t outshine the Silver & Gold Designer Series Paper but instead, they delicately enhance it. So, using different flowers and a few leaves from the Sending Smiles Bundle, stamp off the floral images before stamping on the paper. Next adhere the Designer Series Paper to a card base and add a few Fun Flowers Resin Shapes, which were just the right colours and shapes to match the stamped flowers. Then, die cut “Sending” and the “Sending” word shadow and adhere them to the card base using Stampin’ Dimensionals.

If you like what you see, browse the Sale-A-Bration brochure for the Silver & Gold Designer Series Paper and much more, available (at least while stocks last) until the end of August!

(Don’t know what stamping off means.  All you do is ink your stamp up and then remove some of the ink by stamping on a scrap piece of paper (or on another project! before stamping onto the DSP).

Awesome Otter

I love this set which is one of the free set of stamps that you can earn during Sale-a-bration with a £45 order (excluding delivery).  Don’t you just love the little hat which is an optional accessory for the otter!  Watch out for another card idea coming your way!

Measurements

  • Misty Moonlight: 4-1/4” x 11”, scored at 5-1/2”
  • Basic White: 4” x 5-1/4” and 2-1/2” x 3-1/2”
  • Just Jade: 2-3/4” x 3-3/4”
  • Abstract Beauty Paper: 3-1/2” x 5-1/4” (polka dot pattern) and 4” x 4-1/4” (abstract pattern)

Instructions:

  1. Fold the Misty Moonlight cardstock in half. Adhere the 4” x 5-1/4” piece of Basic White cardstock inside the card.   Adhere the 4” x 4-1/4” piece of Abstract Beauty paper to front of card.
  2. Using the 3-1/2” x 5-1/4” piece of Abstract Beauty Paper, wrap a 10” piece of Misty Moonlight & Petal Pink ribbon around the paper and tie into a knot. Adhere to the base card.
  3. Using the 2-1/2” x 3-1/2” piece of Basic White cardstock, stamp the sentiment towards top of cardstock using Basic Gray ink. Stamp the otter below that & stamp the hat using the same ink.
  4. Colour in the hat using the Light Misty Moonlight and Just Jade Stampin’ Blends. Color the Otter using the Light Smoky Slate Blend and highlight his nose using the Dark Smoky Slate Blend.
  5. Adhere the Basic White cardstock to the Just Jade cardstock and adhere to card base to finish.

Click here for the supplies (during Sale-a-bration you will be asked to choose your free product(s) during checkout).  If you are reading this after Sale-a-bration, just swap out the Otter for another stamp.

Let’s create! Light the Candles!

Let’s give a big “Hip Hip Hooray” for the new addition to the Kits Collection: Light the Candles—a birthday card kit you’ll be using all year!

This kit features bright colours, sparkly embellishments, and a simple peek-through technique that will make you want to party. These cards are perfect for wishing the happiest of birthdays, or to use as invitations to an exciting birthday bash! Now is the perfect time to stock up on birthday cards to use throughout the year. Our kits are based on availability so get yours today, so you’re not left wishing for more!!

Kit contains enough supplies to create 8 cards—4 each of 2 designs—and 8 coordinating envelopes.

Includes printed card bases, printed die cuts, adhesive, embellishments, and a clear block.

Includes an exclusive stamp set and a Coastal Cabana Classic Stampin’ Spot.

Finished card size: 5-1/2″ x 4-1/4″ (14 x 10.8 cm)

Coordinating colours: Coastal Cabana, Daffodil Delight, Magenta Madness, Mango Melody, Night of Navy


If you are new to crafting/stamping, here’s a quick video for you.

Get Creative | You’re a Peach

Isn’t this just the cutest little gift bag. Here’s how you can make it:

Measurements

  • You’re a Peach Designer Series Paper (DSP)
  • Basic White: For Die Cut Label (3-1/2” x 2-1/4”) and 3-3/4” x 3-3/4” scored on all sides at 1/2” plus scrap to stamp peach and leaves
  • Pear Pizzaz: 2-1/2” x 4-1/4”
  • Balmy Blue for Everyday Label punch
  • Organdy Ribbon: 16”

Instructions:

  1. Fold along all score lines of square white card stock, then cut in on opposite sides along score lines to intersecting score lines. Using Tear & Tape, adhere corners inside adjacent edges, creating an upside down “box lid”.
  2. Wrap a band of Tear & Tape around the outside edges of the upside down box lid, and on one 6” end of the Designer Series Paper. Remove protective paper from Tear & Taps and starting in the center of one edge of the box, wrap the bottom edge of 12” DSP around the lid, securing the adhesive on the end of the Designer Series Paper to itself last, creating a “bag”.
  3. Cut banner on one end of Pear Pizzazz card stock, then run through Cut & Emboss machine with Stitched Greenery die. Punch hole at top of tag.
  4. Stamp sentiment at top of label die in black ink, then add branch with Pear Pizzazz ink.
  5. Tap peach stamp in Pale Papaya ink, then lightly add some Calypso Coral ink to one side of the peach with a sponge dauber, then stamp it on scrap card stock. Stamp stem in Pear Pizzazz on scrap card stock and cut out both with coordinating dies.
  6. Adhere label to front of Pear Pizzazz tag. Add peach and stem with dimensionals
  7. Punch label from Balmy Blue card stock and fold in half. Pinch bag front and back together, wrap label over the top and punch a hole through all layers. Thread ribbon through hole.
  8. Tie tag on front of bag.


Sweet as a Peach

Product Suite


More Ideas

Get Creative | Plentiful Plants

sarahs cards

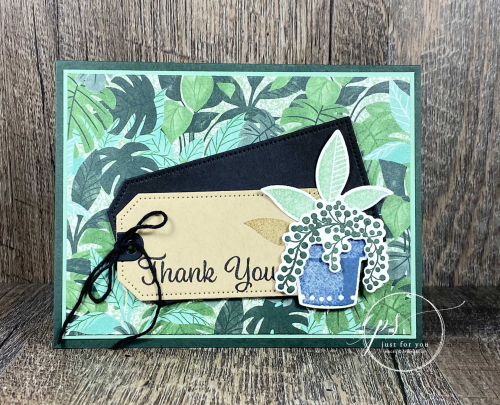
This card features the beautiful Bloom Where You’re Planted Designer Paper which was used in the Way to Goat post. 

Measurements

  • Evening Evergreen: 5 ½” x 8 ½”
  • Soft Succulent: 4 x 5 ¼”
  • Bloom Where You’re Planted DSP: 3 7/8 x 5 1/8”
  • Basic Black: Largest Tag Die plus reinforcing circle
  • Crumb Cake: Second Largest Tag Die
  • Basic White: Scraps for stamping/die cutting

Instructions:

  1. Stamp Crumb Cake Tag with Black ink and add leaf in background in Crumb Cake Ink. Assemble tags together, including reinforcing piece and tie with Black Baker’s Twine.
  2. Stamp Pot in Misty Moonlight, Leaves in Soft Succulent and branches in Evening Evergreen ink on white cardstock and die cut. Assemble and adhere to tag, popped up.
  3. Adhere DSP to Soft Succulent layer and then adhere to Card.
  4. Adhere tag to card as shown.

SUPPLIES – click here to go to the cart

Depending on when you are reading, some products may have retired.

Get Creative | Way to Goat

sarahs cards

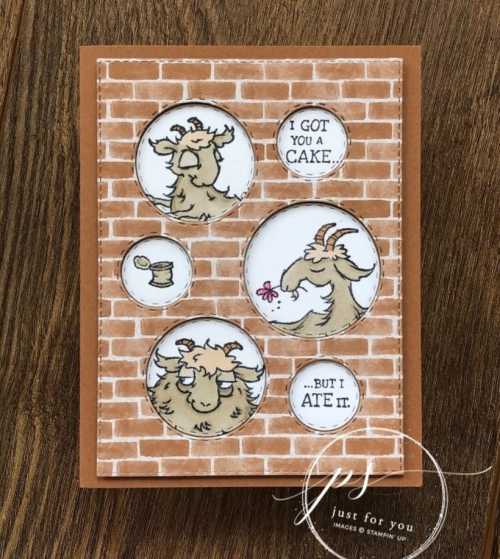
Isn’t this the cutest card.  I also love that you don’t have to stamp a load of bricks as the paper is from the bloom where you are planted papers.  The sentiments in the stamp set make this card fun.  


You can make it too!

Measurements:

  • Cinnamon Cider: 8-1/2” x 5-1/2”, 5-1/2” x 4”
  • Basic White: 5-1/4” x 4” (inside of card); Scraps for all of the images, large enough to die cut
  • Bloom Where You’re Planted Brick Pattern DSP: 5-1/2” x 4”

Instructions:

  1. Fold the large piece of Cinnamon Cider cardstock in half and sharpen the crease with a Bone Folder. Set aside.
  2. Glue the Designer Series Paper to the smaller piece of Cinnamon Cider cardstock. Don’t be stingy as this entire layer will be die cut. 
  3. Using the Stampin’ Cut & Emboss Machine and the Picture This die with the circles, die cut the DSP/cardstock layer. Punch out the circles, and then use the largest Stitched Rectangle to cut around the edge of the layer.  Attach to the card base with Stampin’ Dimensionals.
  4. Stamp the goats and tin can onto scrap Basic White cardstock using Memento ink. Colour the images using Stampin’ Blends as follows:
    1. Dark Cinnamon Cider for the horns (no blending)
    2. Ivory for the wool at the top of their heads
    3. Dark & Light Crumb Cake for their bodies and the can
    4. Dark & Light Polished Pink for the flower
  5. Stamp the ‘cake’ sentiment onto a smaller piece of scrap Basic White cardstock. Carefully ink the ‘… but I’ part of the sentiment and stamp onto scrap white cardstock.  Clean the stamp, and then carefully ink the ‘Ate it’ side of the stamp.  Stamp immediately below the ‘… but I’ words.  You could do this with a Basic Black Stampin’ Write Marker but it’s not difficult to do with the Memento ink pad. 
  6. Die cut each image individually using the Picture This die. Glue all six images onto the card base.
  7. If you’d like, stamp a tin can in the bottom right corner of the larger Basic White cardstock and then attach to the inside of the card.

SUPPLIES – click here to go to the cart*

*depending on when you are visiting, some items may have retired.

Click me to request the pdf tutorial